
Hey folks! Today, I’m here give some hints how you can deploy your Reflex app’s frontend straight to CloudFlare. It’s a great way to make use of CloudFlare’s CDN perks for static HTML, and they’ve been adding some cool dynamic features (they call them 'workers') that I’ve played around with in other projects (and also this page is hosted on CloudFlare itself). This can be a breeze to integrate into your CI/CD pipelines, allowing you to auto-magically get preview pages for new feature branches. Let’s dive in!
Background
Before we get into the nitty-gritty of deploying Reflex apps to CloudFlare, it’s good to have a basic understanding of deploying a Reflex app on any platform. We covered the essentials in our previous post on [running Reflex apps in production], which talks about the setup and what you’ll need for deployment.
If you missed that one, take a moment to check it out. I’ll grab a coffee in the meantime and see you back here in a bit!
What You Need to Know First
Alright, now that you’re all caught up, let’s talk about how to focus on deploying just the frontend to CloudFlare.
For starters, I assume you’ve got the basics of CI/CD workflows down. We’ll be using GitHub Actions, but the setup is straightforward enough to adapt to other tools like GitLab or TravisCI.
Deployment Prep
You would need 2 accounts:
- GitHub
- CloudFlare
For CloudFlare the free account is enough for the beginning. I guess GitHub shall also work with the free version (although I don't know if they restrict runner usage?)
To get your frontend ready, you’ll use the following command with Reflex:
Reflex let's your export the frontend by invoking following command:
reflex export --frontend-only
If you’re a Poetry user like me, you’ll do:
poetry run reflex export --frontend-only
A few key things to remember:
- Double-check that your .env file has all the necessary settings since the export command needs them, backend-related or not.
- Set the API_URL correctly—it should point to your backend.
This process will produce a ZIP file of your frontend, which you could manually upload to CloudFlare, but we’re aiming to automate, right?
Setting Up CloudFlare
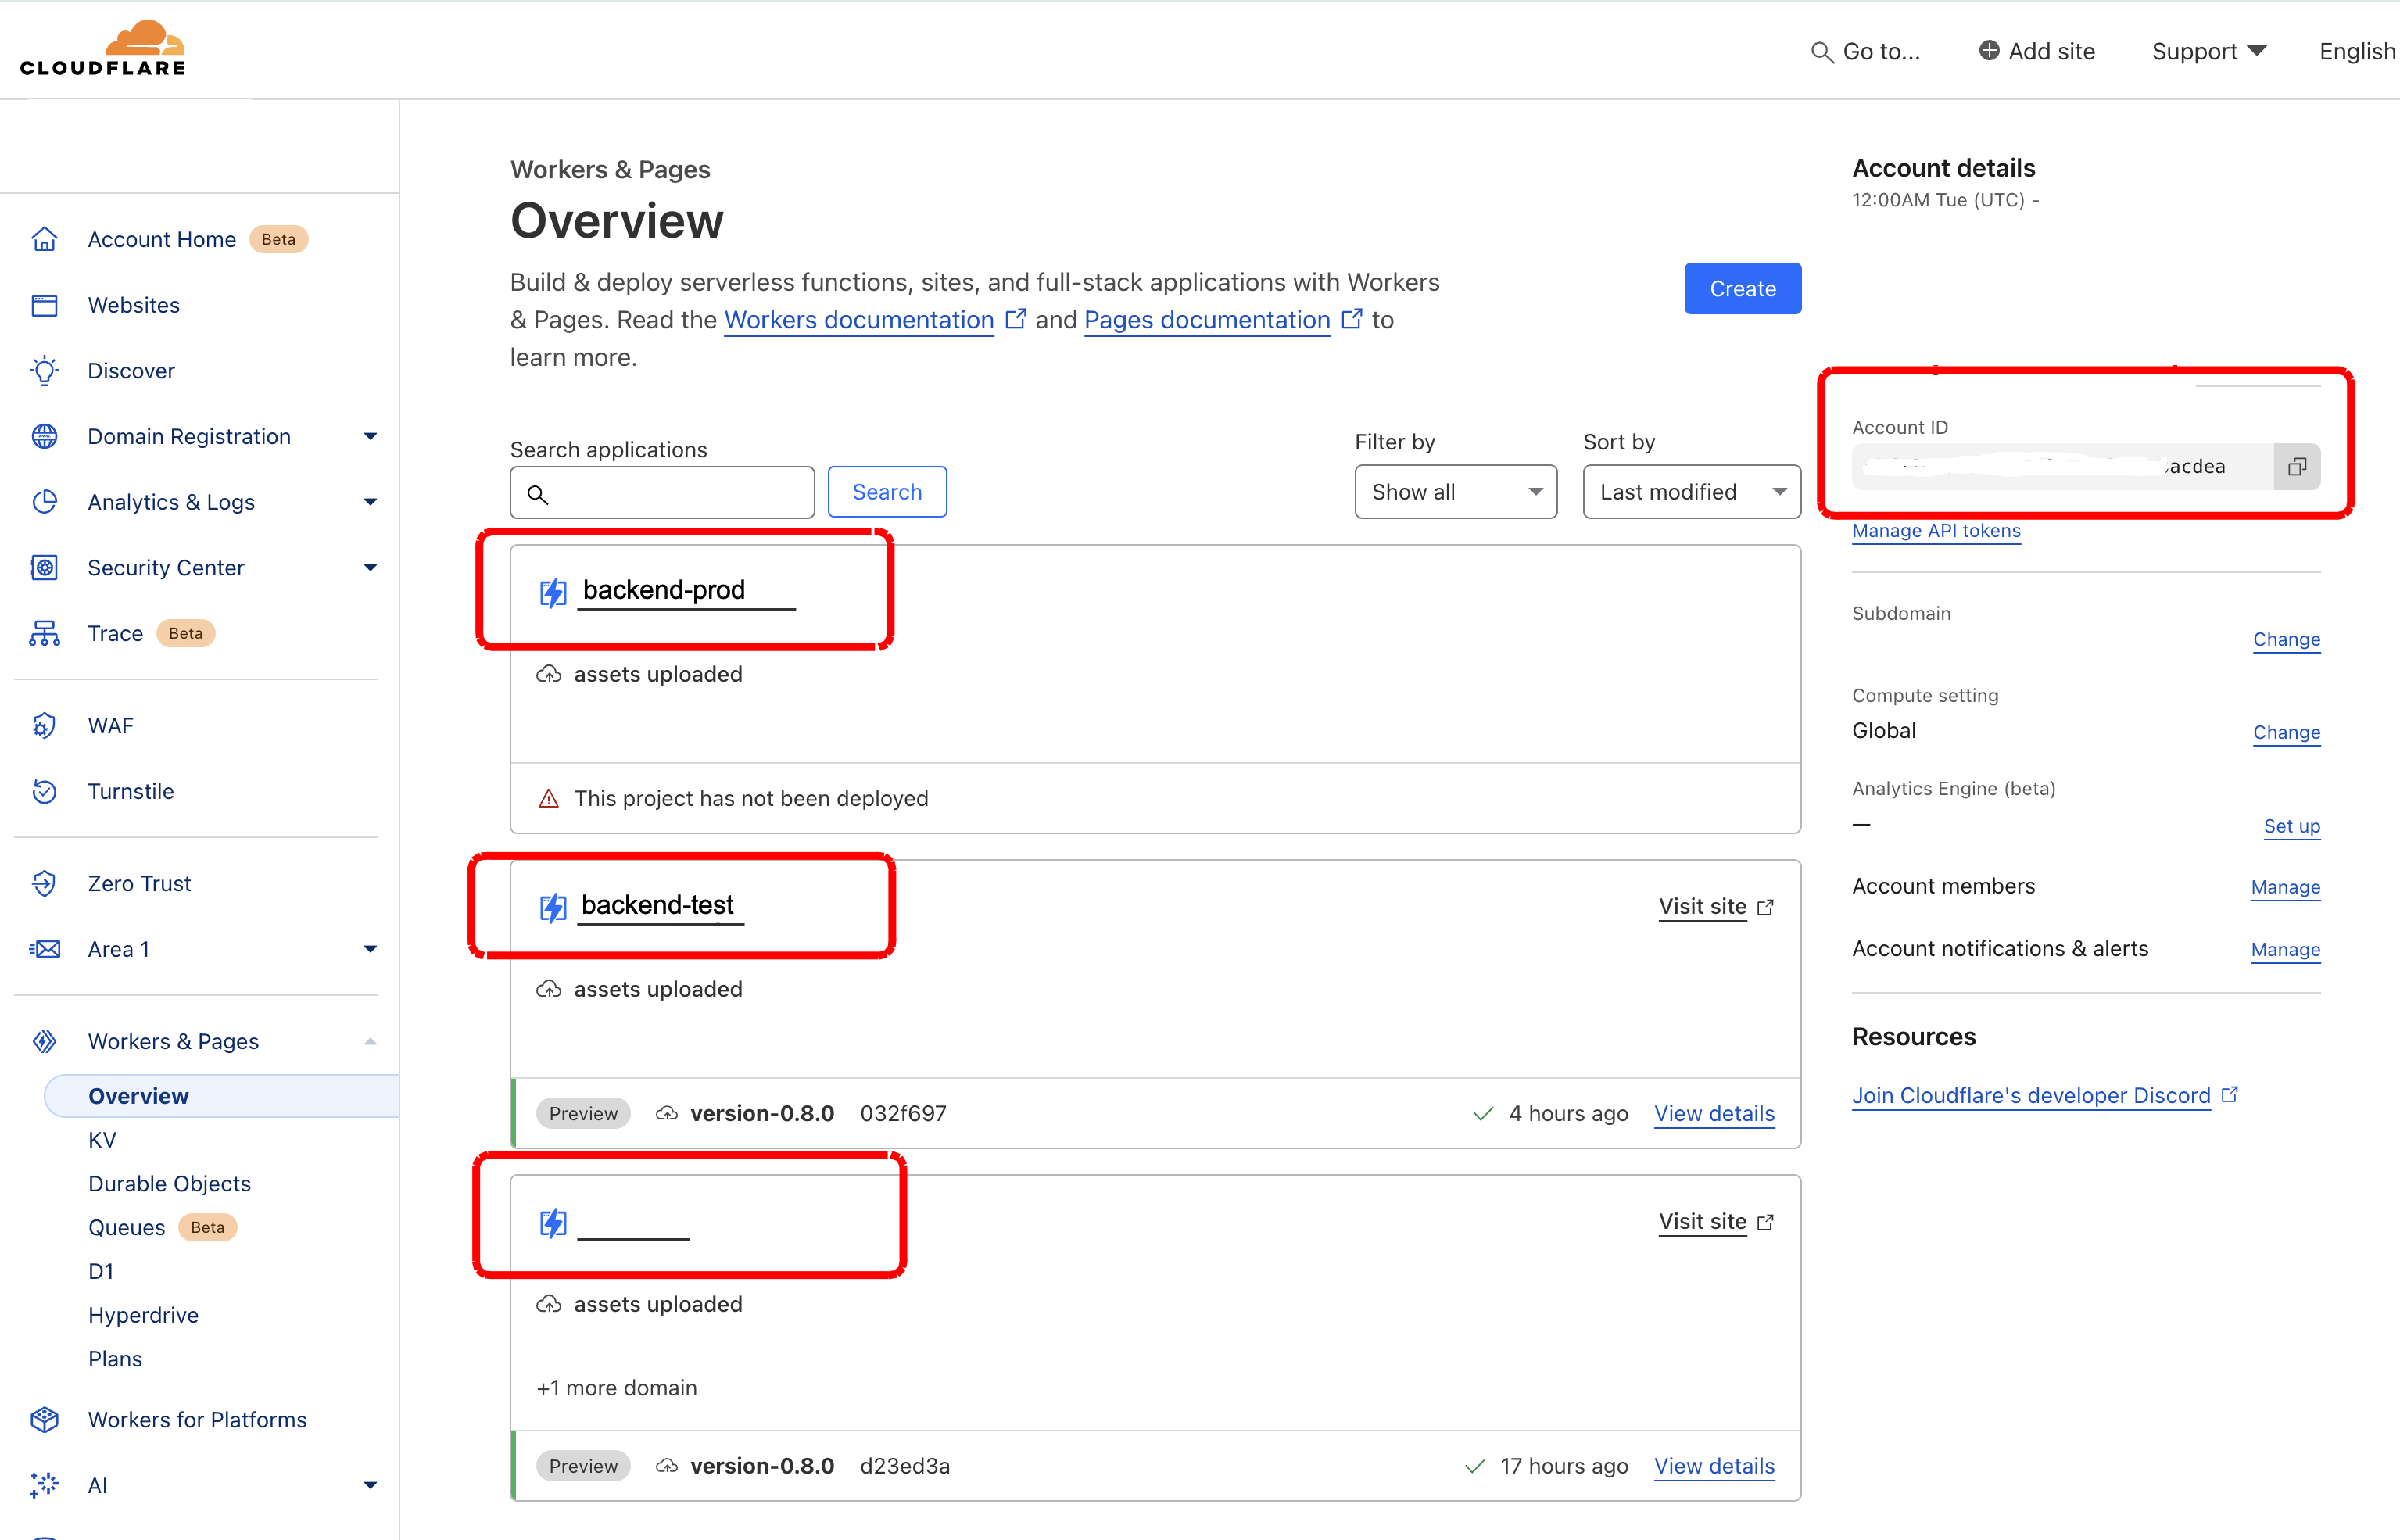
Here’s how I got things set up on CloudFlare:
- First, create a page under "Worker & Pages"—and make sure to remember its name.
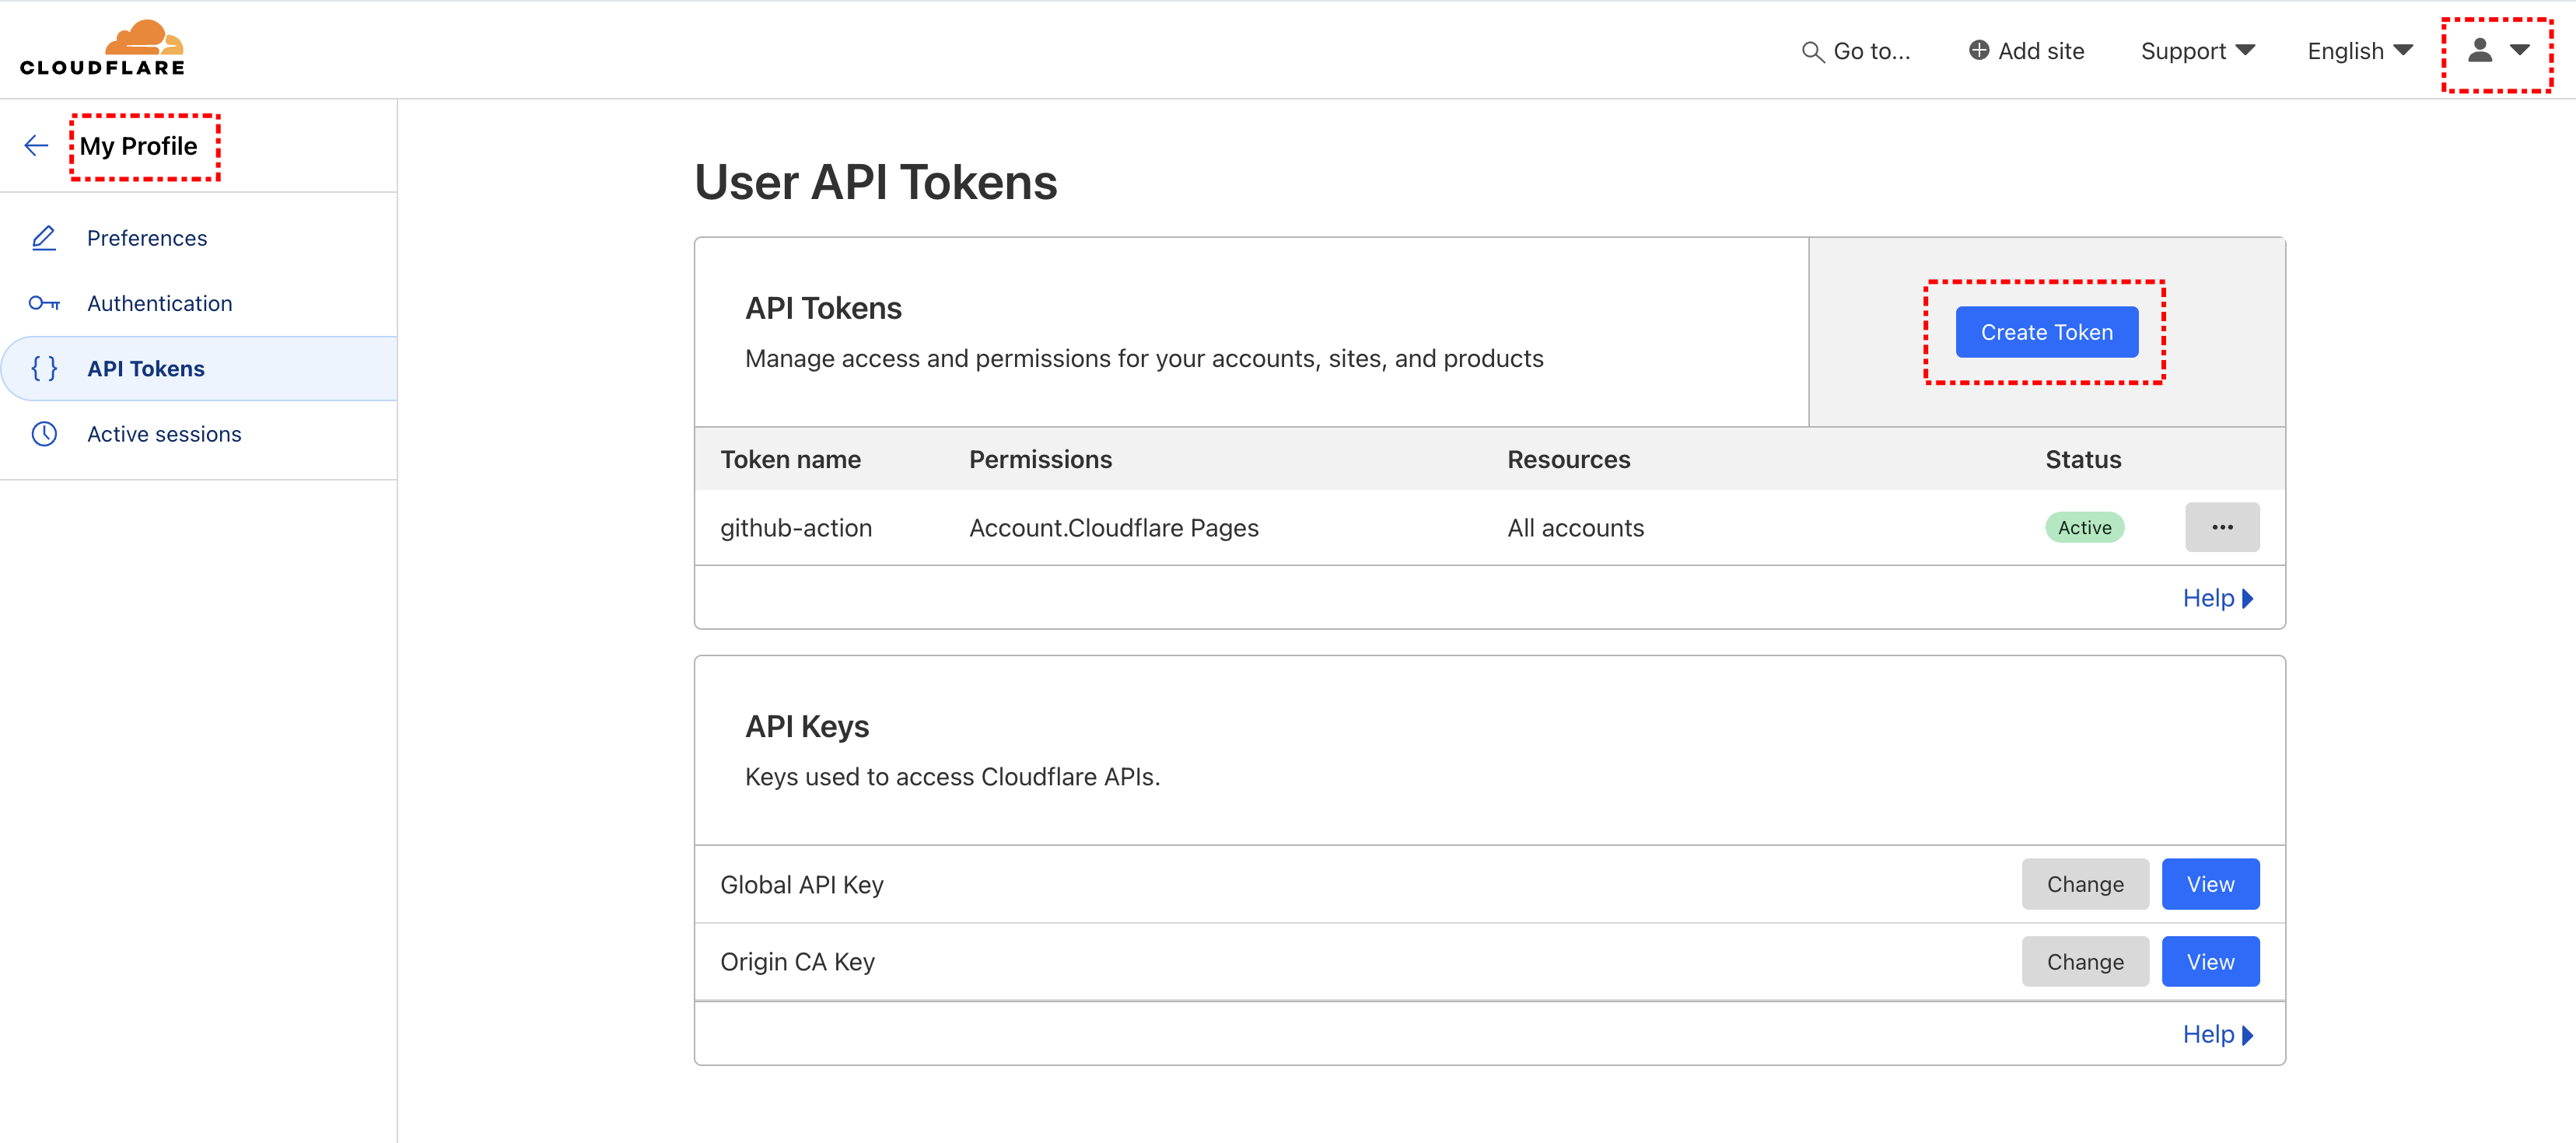
- Create the API Token
- Grab your Account ID
Here’s what my dashboard looked like after setting up a few pages—you’ll need these details:
And here’s where I set up my API Key for GitHub Actions:
Configuring GitHub
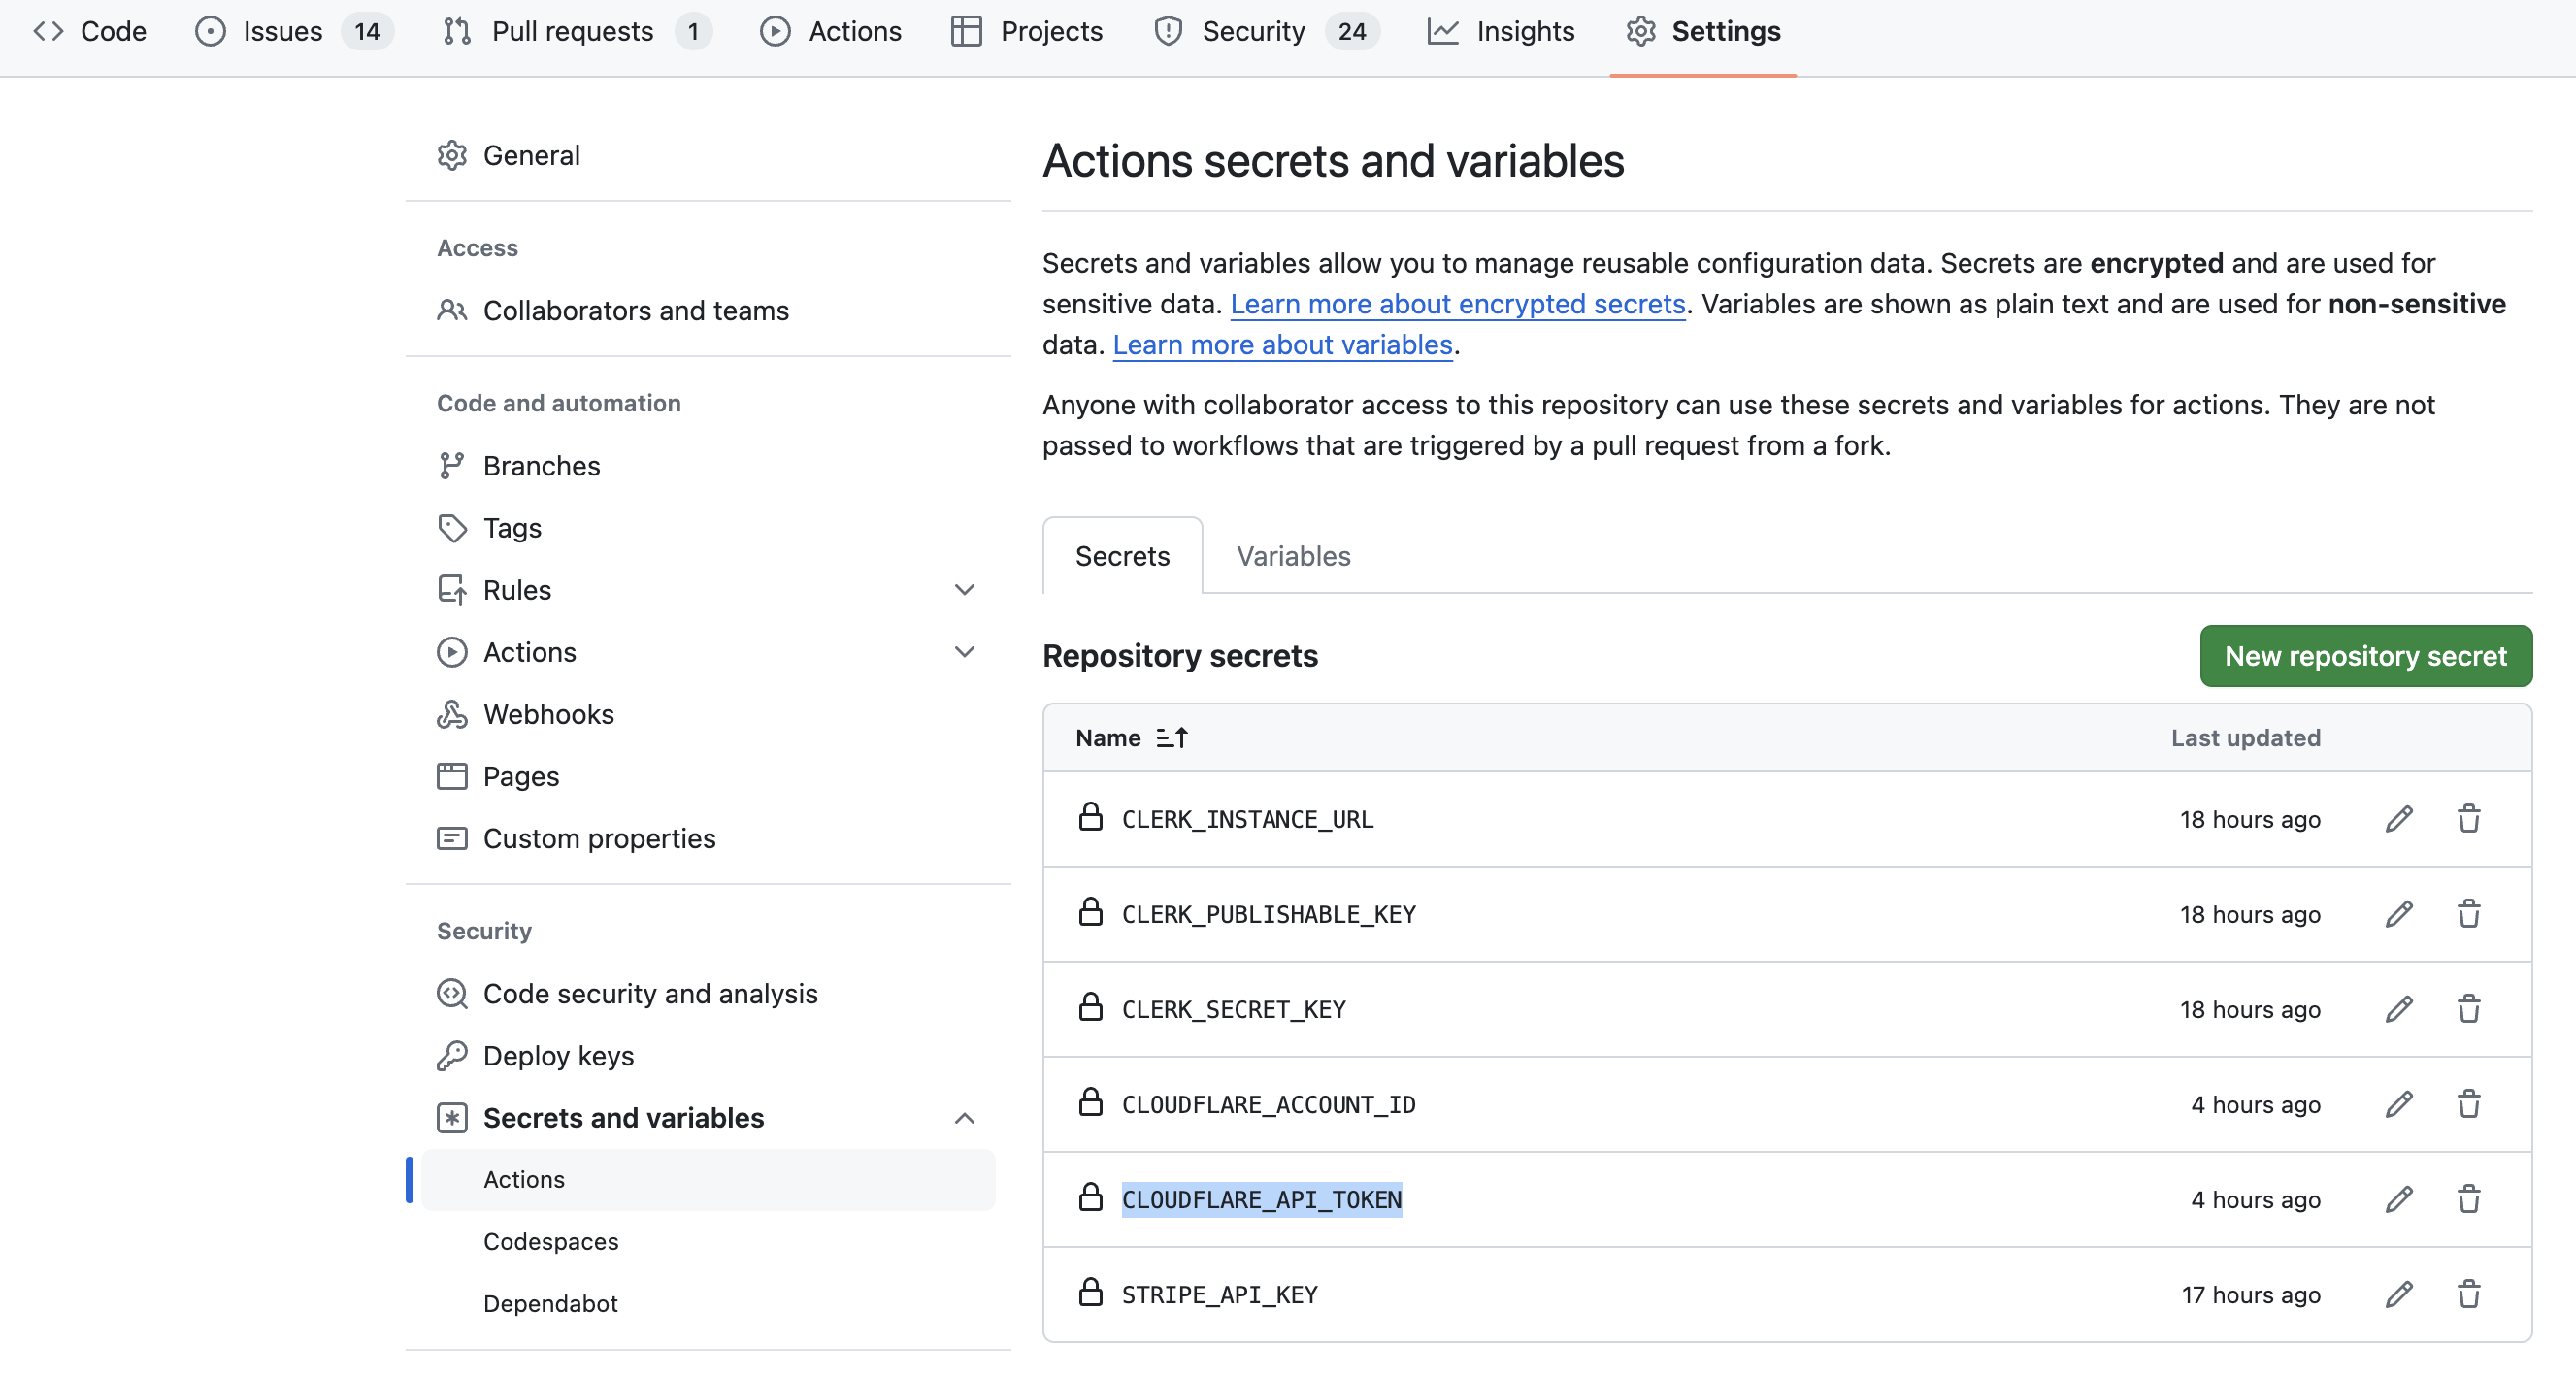
Over on GitHub, you’ll need to set up these secrets for building the app:
- STRIPE_API_KEY
- CLERK_INSTANCE_URL
- CLERK_PUBLISHABLE_KEY
- CLERK_SECRET_KEY
And for deploying:
- CLOUDFLARE_ACCOUNT_ID
- CLOUDFLARE_API_TOKEN
Plus, you’ll set an environment variable for the backend URL:
- API_URL
Here’s a peek at the GitHub settings you’ll need:
Automating the Deployment
Here’s what the GitHub workflow looks like. You’ll save this under ".github/workflows/deploy.yml" in your repo:
name: deploy frontend to cloudflare

on: [push]

jobs:
  deploy-frontend-to-cloudflare:
    runs-on: ubuntu-latest

    steps:
      - uses: actions/checkout@v3

      - name: Install Python
        uses: actions/setup-python@v4
        with:
          python-version: 3.11

      - name: Install poetry
        uses: abatilo/actions-poetry@v2
        with:
          poetry-version: 1.8.3

      - name: Install dependencies
        run: poetry install

      - name: Init Reflex
        run: poetry run task init

      - name: Export
        env:
          API_URL: ${{ env.API_URL }}
          STRIPE_API_KEY: ${{ secrets.STRIPE_API_KEY }}
          CLERK_INSTANCE_URL: ${{ secrets.CLERK_INSTANCE_URL }}
          CLERK_PUBLISHABLE_KEY: ${{ secrets.CLERK_PUBLISHABLE_KEY }}
          CLERK_SECRET_KEY: ${{ secrets.CLERK_SECRET_KEY }}
        run: poetry run reflex export --frontend-only

      - name: Unzip
        run: unzip frontend.zip -d frontend-public

      - name: Publish
        uses: cloudflare/pages-action@1
        with:
          apiToken: ${{ secrets.CLOUDFLARE_API_TOKEN }}
          accountId: ${{ secrets.CLOUDFLARE_ACCOUNT_ID }} # <--- account id from Dashboard Screenshot
          projectName: frontend # <--- here put the name of the page from Dashboard Screenshot
          directory: frontend-public
          gitHubToken: ${{ secrets.GITHUB_TOKEN }}
With the next commit/push you will see the action going on!
3. Deploy
Deployment happens automatically on each push for each branch. You can then go further to finetune on which branches and/or conditions you would like the workflow to kick off.
The CloudFlare Dashboard shows you the URLs to access the deployed frontend. Also the github action itself logs it.
You also could go further in CloudFlare to assign domain names etc. but this is out of scope of this short blog post.
Visit your newly deployed frontend at https://<random url from CloudFlare>
This means that your application is now deployed to the public internet and is ready to accept user requests. Go ahead and open the link in your browser and find it out for yourself!